How to Resize Images Without Losing Their Aspect Ratio
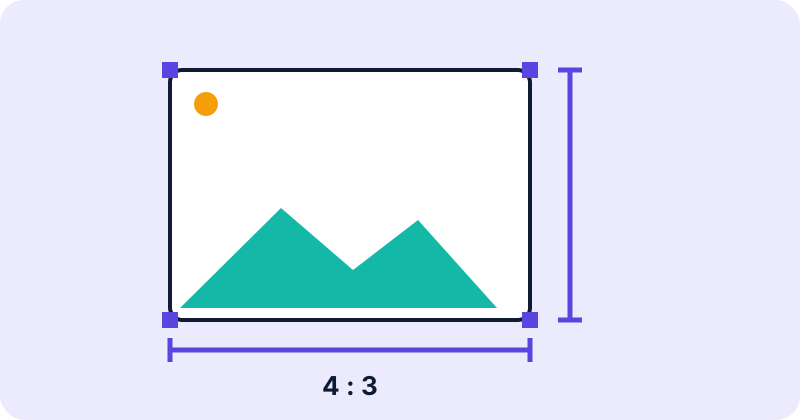
Everyone has seen a photo that looks wrong: faces too wide, circles turned into ovals. That happens when width and height are changed by different amounts. Keeping the aspect ratio means both scale together, so the picture keeps its shape.
What aspect ratio means
The aspect ratio is the relationship between width and height. A 4000 × 3000 image is 4:3, because dividing both numbers by 1000 gives 4 and 3. A 1920 × 1080 image is 16:9. Common ratios include 1:1 (square), 4:3, 3:2 and 16:9.
The formula
When you know the new width, the new height is: new height = new width × original height ÷ original width. When you know the new height, the new width is: new width = new height × original width ÷ original height.
Examples
- 4000 × 3000 resized to a width of 1200: 1200 × 3000 ÷ 4000 = 900, so 1200 × 900.
- 1920 × 1080 resized to a width of 1280: 1280 × 1080 ÷ 1920 = 720, so 1280 × 720.
- 6000 × 4000 resized to a width of 1500: 1500 × 4000 ÷ 6000 = 1000, so 1500 × 1000.
- 1920 × 1080 resized to a height of 540: 540 × 1920 ÷ 1080 = 960, so 960 × 540.
How to do it with the tool
- Open the Image Resizer and choose your picture.
- Leave “Keep aspect ratio” ticked.
- Type either the width or the height. The other number follows automatically.
- Press Resize image, check the preview and download.
Resizing is not cropping
Resizing changes the scale of the entire picture. Cropping removes parts of it. If a site demands exactly 600 × 600 and your photo is 3:2, you cannot reach a square by resizing alone without distortion. You would have to crop the picture to a square first, then resize it. The resizer here does not crop.
Pixels, inches and DPI
Pixel size and print size are different things. At 300 pixels per inch, a 1200-pixel-wide image covers 4 inches. The same file printed at 150 pixels per inch covers 8 inches but looks softer. Screens care only about pixel dimensions.
Common mistakes
- Typing both width and height with the ratio lock off, which stretches the image.
- Enlarging a small image and expecting more detail. Enlarging stretches existing pixels.
- Repeatedly resizing the same file. Resize from the original instead.
- Forgetting that a rounded pixel value can differ slightly from the exact ratio.
Tips
Shrinking is safer than enlarging. If you need a smaller file as well, resize first and then compress. Keep a copy of the original in case you need a different size later.
Choosing target dimensions
Start from where the image will be used. For a web page, the width it is displayed at matters more than the camera’s original size. If an image appears 600 pixels wide on screen, a 1200-pixel-wide file keeps it sharp on high-density screens, which show twice as many physical pixels per layout pixel, while a 4000-pixel original just wastes bandwidth. For social networks and marketplaces, check the platform’s current recommended sizes, because they change and differ between places.
Resizing for print
Printing needs more pixels per inch than a screen. A common quality target is 300 pixels per inch. A 6 × 4 inch print at that density needs 1800 × 1200 pixels (6 × 300 and 4 × 300). A full A4 page, at 8.27 × 11.69 inches, needs roughly 2480 × 3508 pixels. If your image has fewer pixels, it can still be printed, but fine detail will look softer.
What happens to the pixels
When an image is made smaller, the software averages groups of original pixels into one, which preserves the look but discards detail. When it is made larger, the software has to invent pixels by blending neighbours. That is why a small image blown up looks blurry. If you may need several sizes later, always keep the original and make each copy from it instead of resizing a copy that was already resized.
Resize first, then compress
The best order is to resize to the right dimensions and then compress. Compressing a huge image and then shrinking it wastes effort, and each lossy save slightly reduces quality. The Image Compressor works well as the last step.
Handling a ratio that does not match the requirement
Suppose a form needs 600 × 800 pixels (3:4) and your photo is 4000 × 3000 (4:3), which is the wrong way round. Resizing alone would stretch the picture. The correct approach is to crop first to the required shape, then resize. A photo taken in landscape could be re-taken in portrait, or cropped around the subject. After cropping to a 3:4 area, resizing to 600 × 800 is a simple scale with no distortion.
A short checklist
- Write down the required width, height and any maximum file size.
- Check whether the ratio of your photo matches the ratio required.
- If it does not, crop first.
- Resize with the aspect ratio locked.
- Compress if the file size is still too large.
- Open the final file to confirm its dimensions and appearance.
Conclusion
Pick one dimension, calculate the other from the ratio, and let the lock do the arithmetic. If the ratio does not match the target, crop first.
Try the tools
Frequently asked questions
What is the aspect ratio of 1920 × 1080?
16:9.
Can I enlarge a small image safely?
You can, but it will look soft because no new detail is created.
Why is my result one pixel off?
The exact ratio may not be a whole number, so the value is rounded.
Does resizing reduce file size?
Usually, because fewer pixels need less data, but the effect depends on format and content.